Connecting Datto Autotask
- Register Gradient
- Create Security Level
- Create API User
- Input API Key and Secret
- Alerts PSA Board Identification
Register Gradient
Upon initial registration of your new Gradient account, you will select Autotask and click Next. You will then be given a connection checklist. Please gather these items before progressing to the next page. Let's head over to Autotask.
Copy a Security Level
To create a new security level, right-click on the level that most closely matches the one you want to create, then click the Copy Security Level option.
NOTE: The License type of the Security level you copy must be API user.
Log in to Autotask.
Navigate to Admin > Company Settings & Users > Resources/Users (HR) > Security Levels.
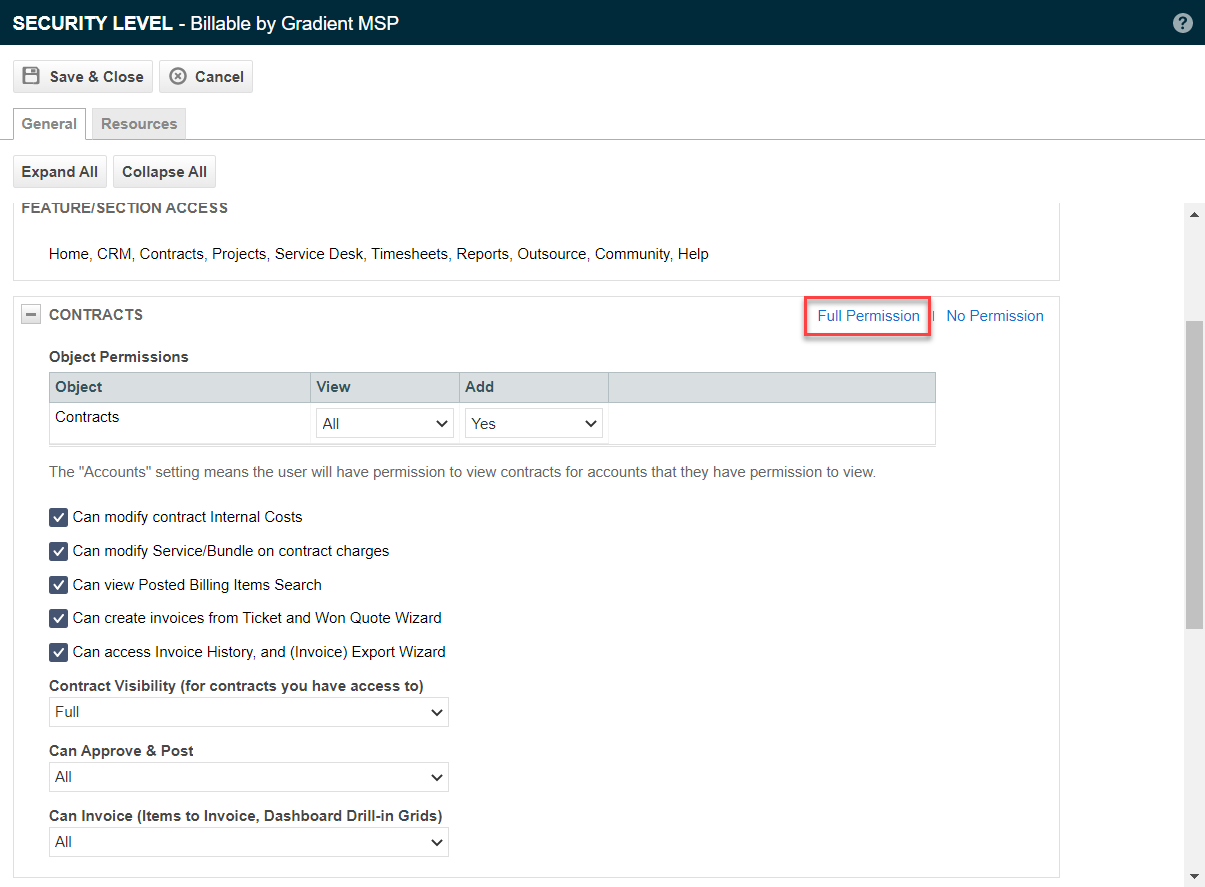
Copy a new Security Level with the following permissions:
- Full Permission to Contracts.
- All permission to Customer & Cancellation under CRM. This allows all view Object Permissions to Companies.

- Full Permissions to Inventory.

- Under Admin make sure that the following are enabled:
-Application-wide (Shared) Features (Full Access)
-Products, Services & Inventory 
-
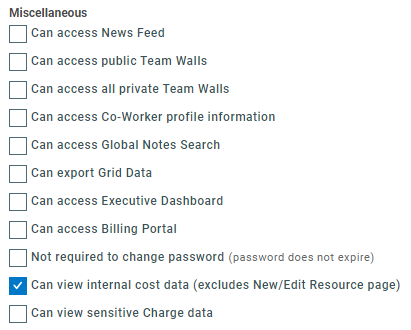
Under Other > Miscellaneous enable "Can view internal cost data (excludes New/Edit Resource page)".
Click Save & Close.
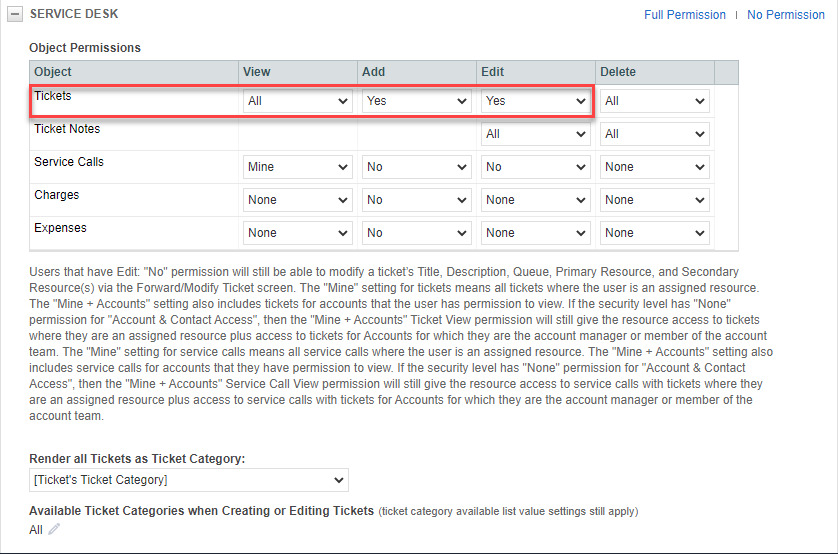
If you wish to enable the Alerts module in Gradient, follow these additional steps:
- Add to the Service Desk Tickets View, Add and Edit Permissions
- Under Service Desk -> Other Permissions, select Can edit Status of complete tickets, Can administer tags and tag groups, and Can remove tags from tickets.
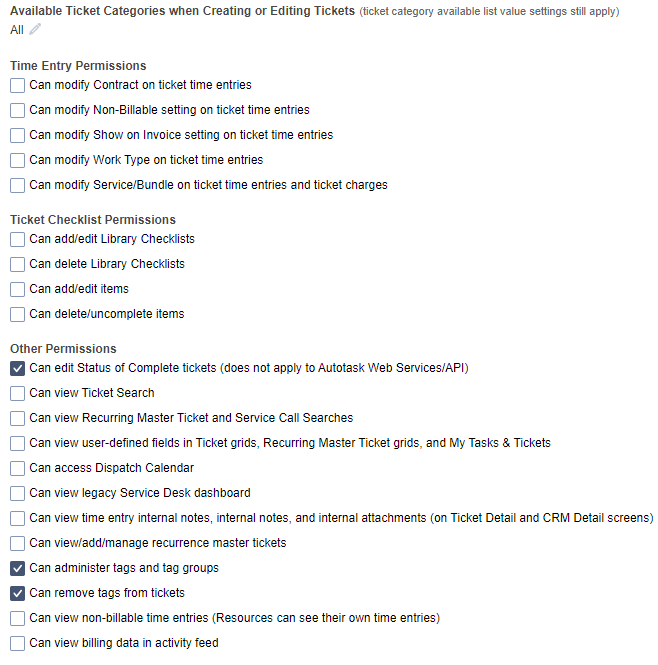
Click Save & Close.
Autotask Service Queues must have a resource assigned within Autotask for it to appear within the board selection dropdown.
Create API User
Navigate to Admin > Company Settings & Users > Resources/Users (HR) > Resources/Users.
Hover over the New dropdown, and click New API User.
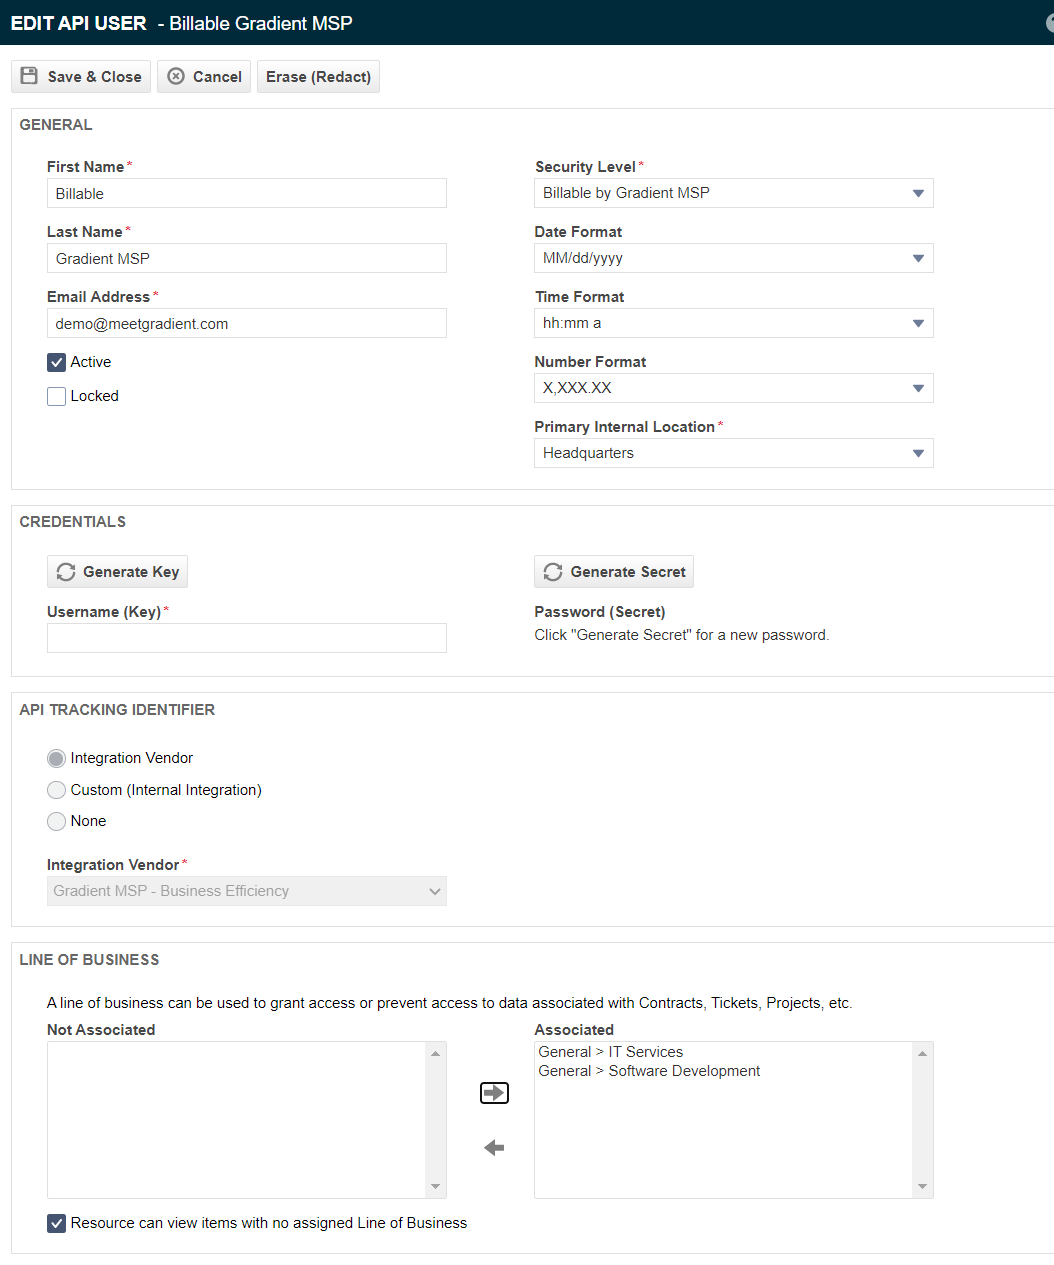
Enter all required contact fields.
Select the Security Level created from the previous steps.
Generate Username (Key) and Password (Secret) and have these ready for the next steps.
Select Gradient MSP - Business Efficiency from the Integration Vendor dropdown.
Associate all Lines of Business.
Save & Close before entering the information inside Gradient.
Complete Connection with Gradient
Return to your Gradient product and continue with the Setup Wizard until you hit Step 4: Authenticate your API user.
Enter the Username (Key) and Password (Secret) from the previous steps.
Click Save and Test. The wizard will run the initial sync, which may take a few minutes, before asking you to continue to your dashboard.
Congratulations, you've successfully connected your PSA!
Note: If any service cards show "clientName", please confirm that all Accounts with active Contracts have the Account Type listed as Customer.
Alerts PSA Board Identification
When connecting an Alerts integration, you will be asked for a PSA Board ID. To find the Board ID from Autotask, please follow the below steps.
- Within Autotask navigate to Admin -> Service Desk (Tickets) -> Queues
- Click the Pencil icon for the queue you want alerts to go to
- In the URL of the Edit Queue window, there will be an eight-digit number. This represents the Board ID which you will select from the dropdown within Gradient.