How to Connect Datto SaaS Protection
To configure and connect the Datto SaaS Protection integration, please select from the following:
Generate Datto Unified Continuity API Keys
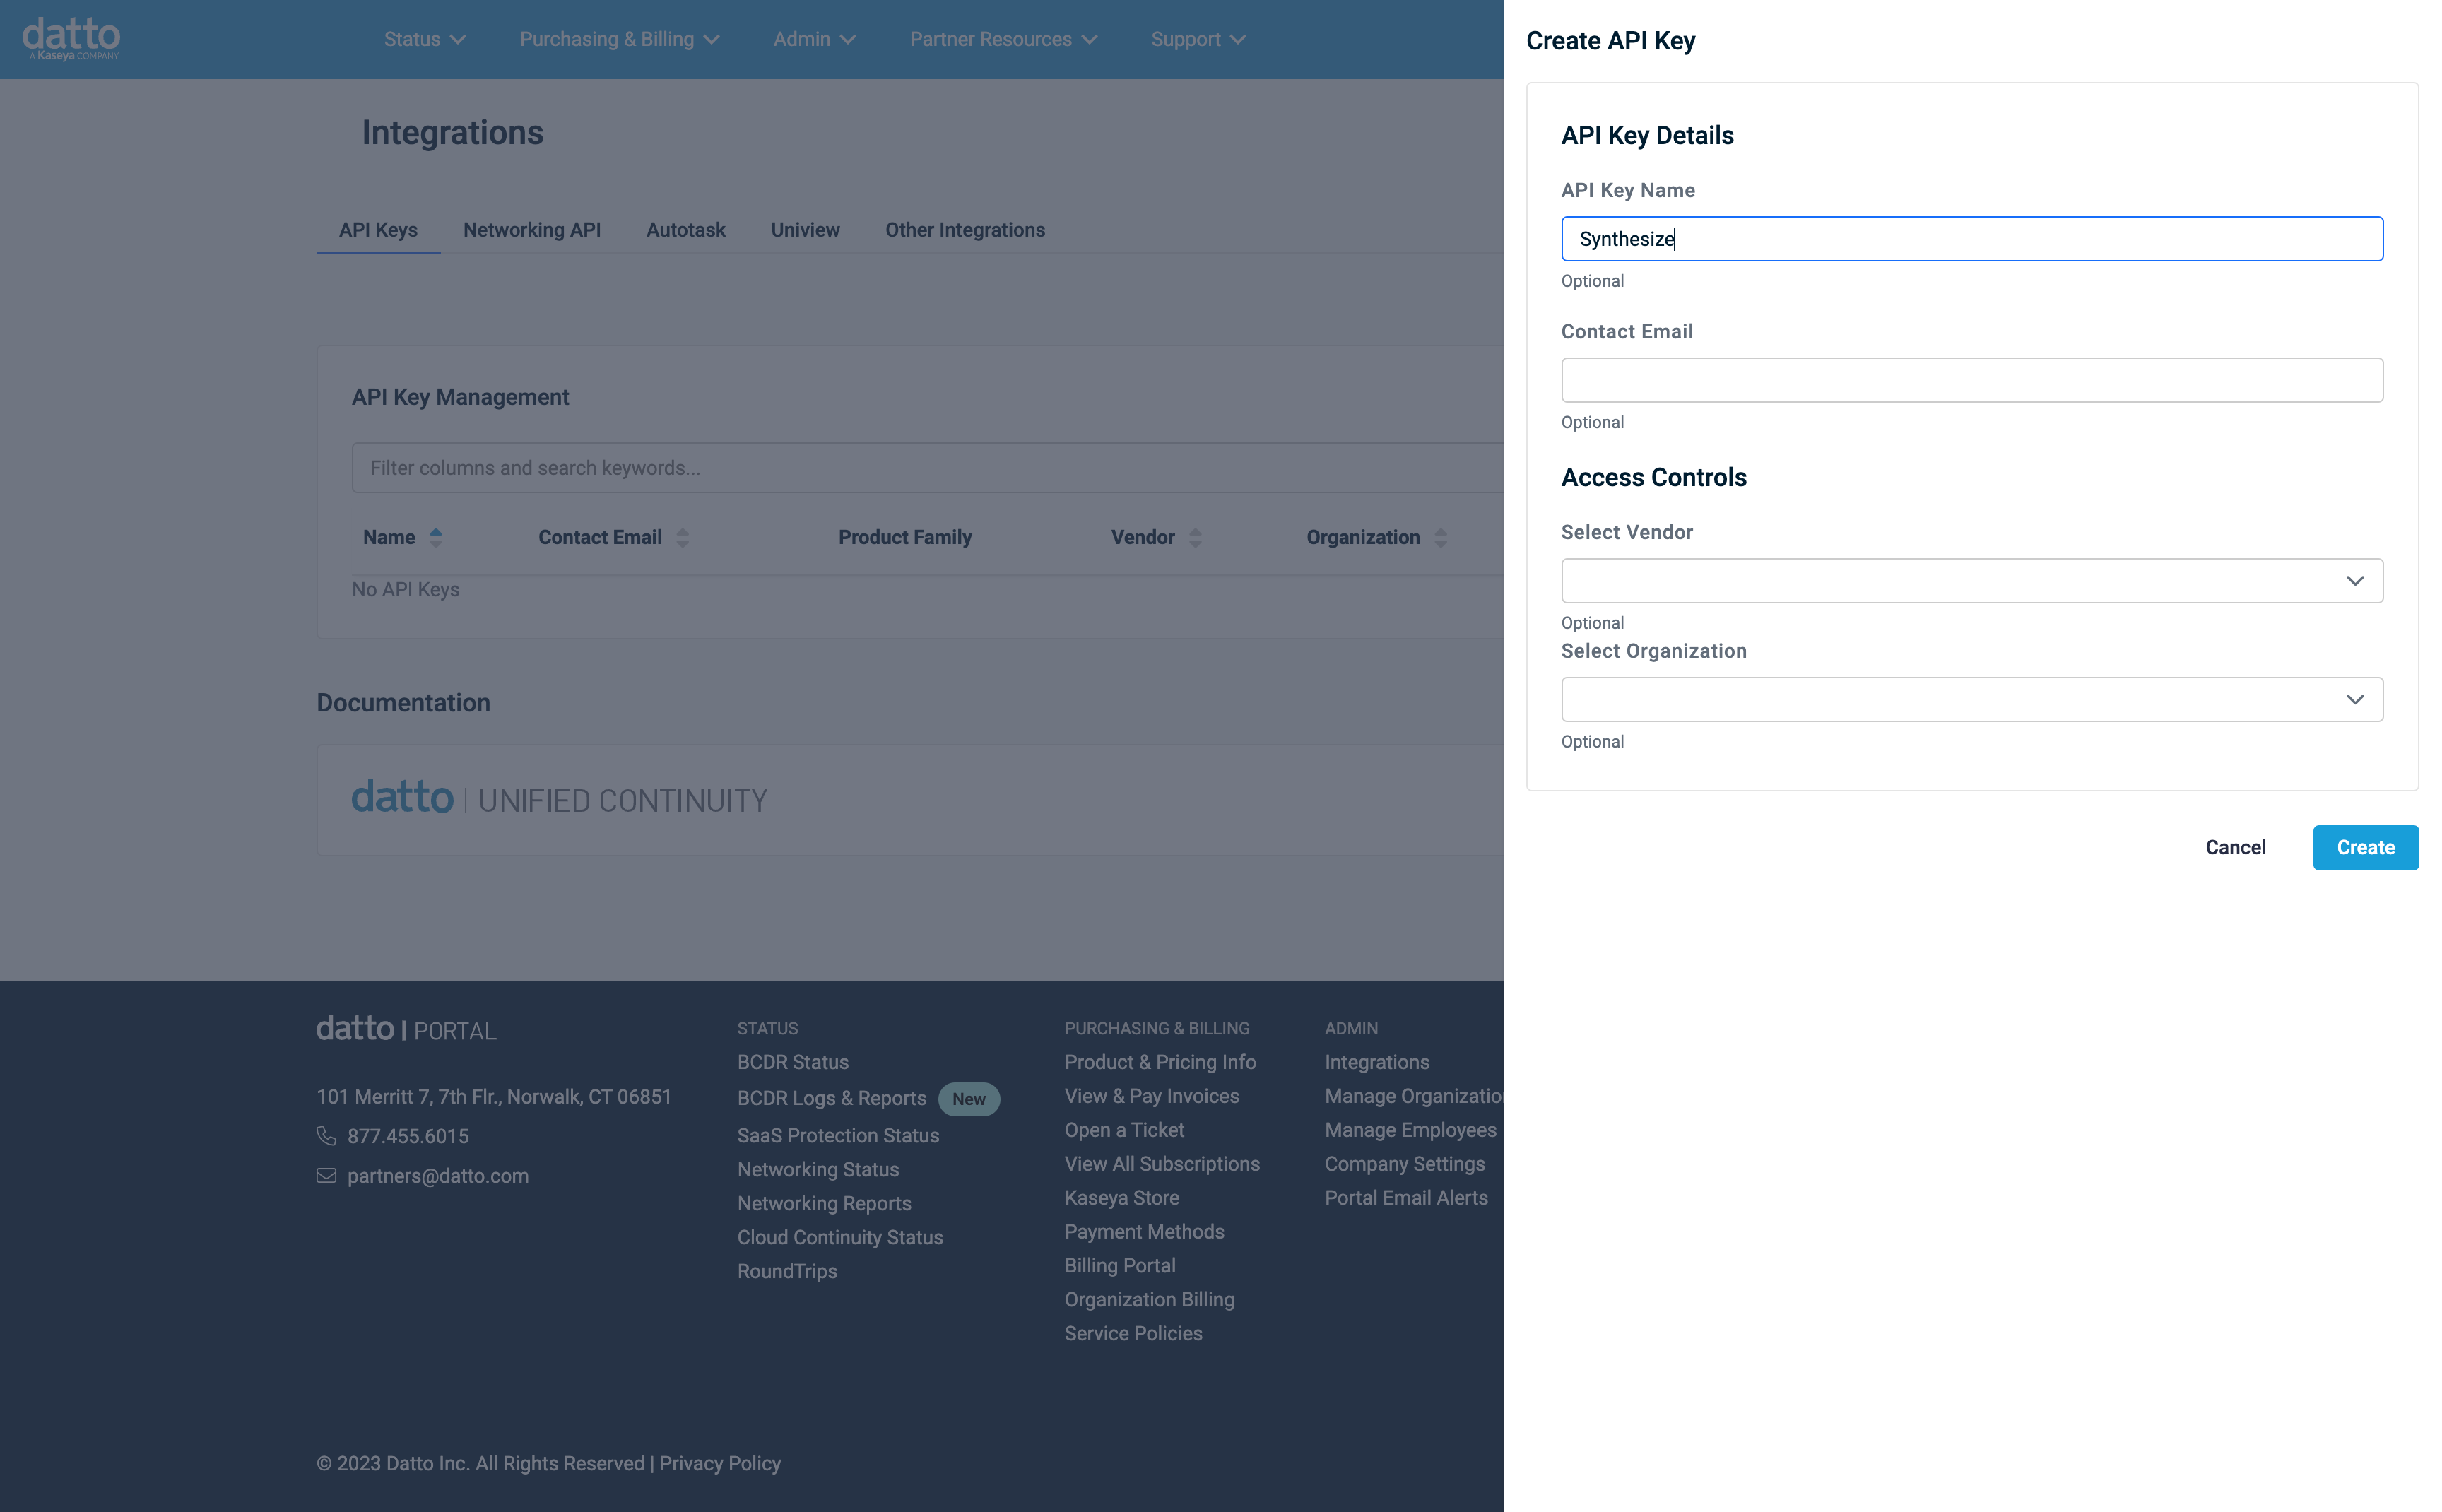
When creating API Keys in Datto, it is very important that the "Select Vendor" dropdown menu is left BLANK. If any vendor is selected for that dropdown box the API Keys that get created will not work when you attempt to authenticate with them.
- Login to Datto Partner Portal.
- Navigate to Integrations under the Admin section.
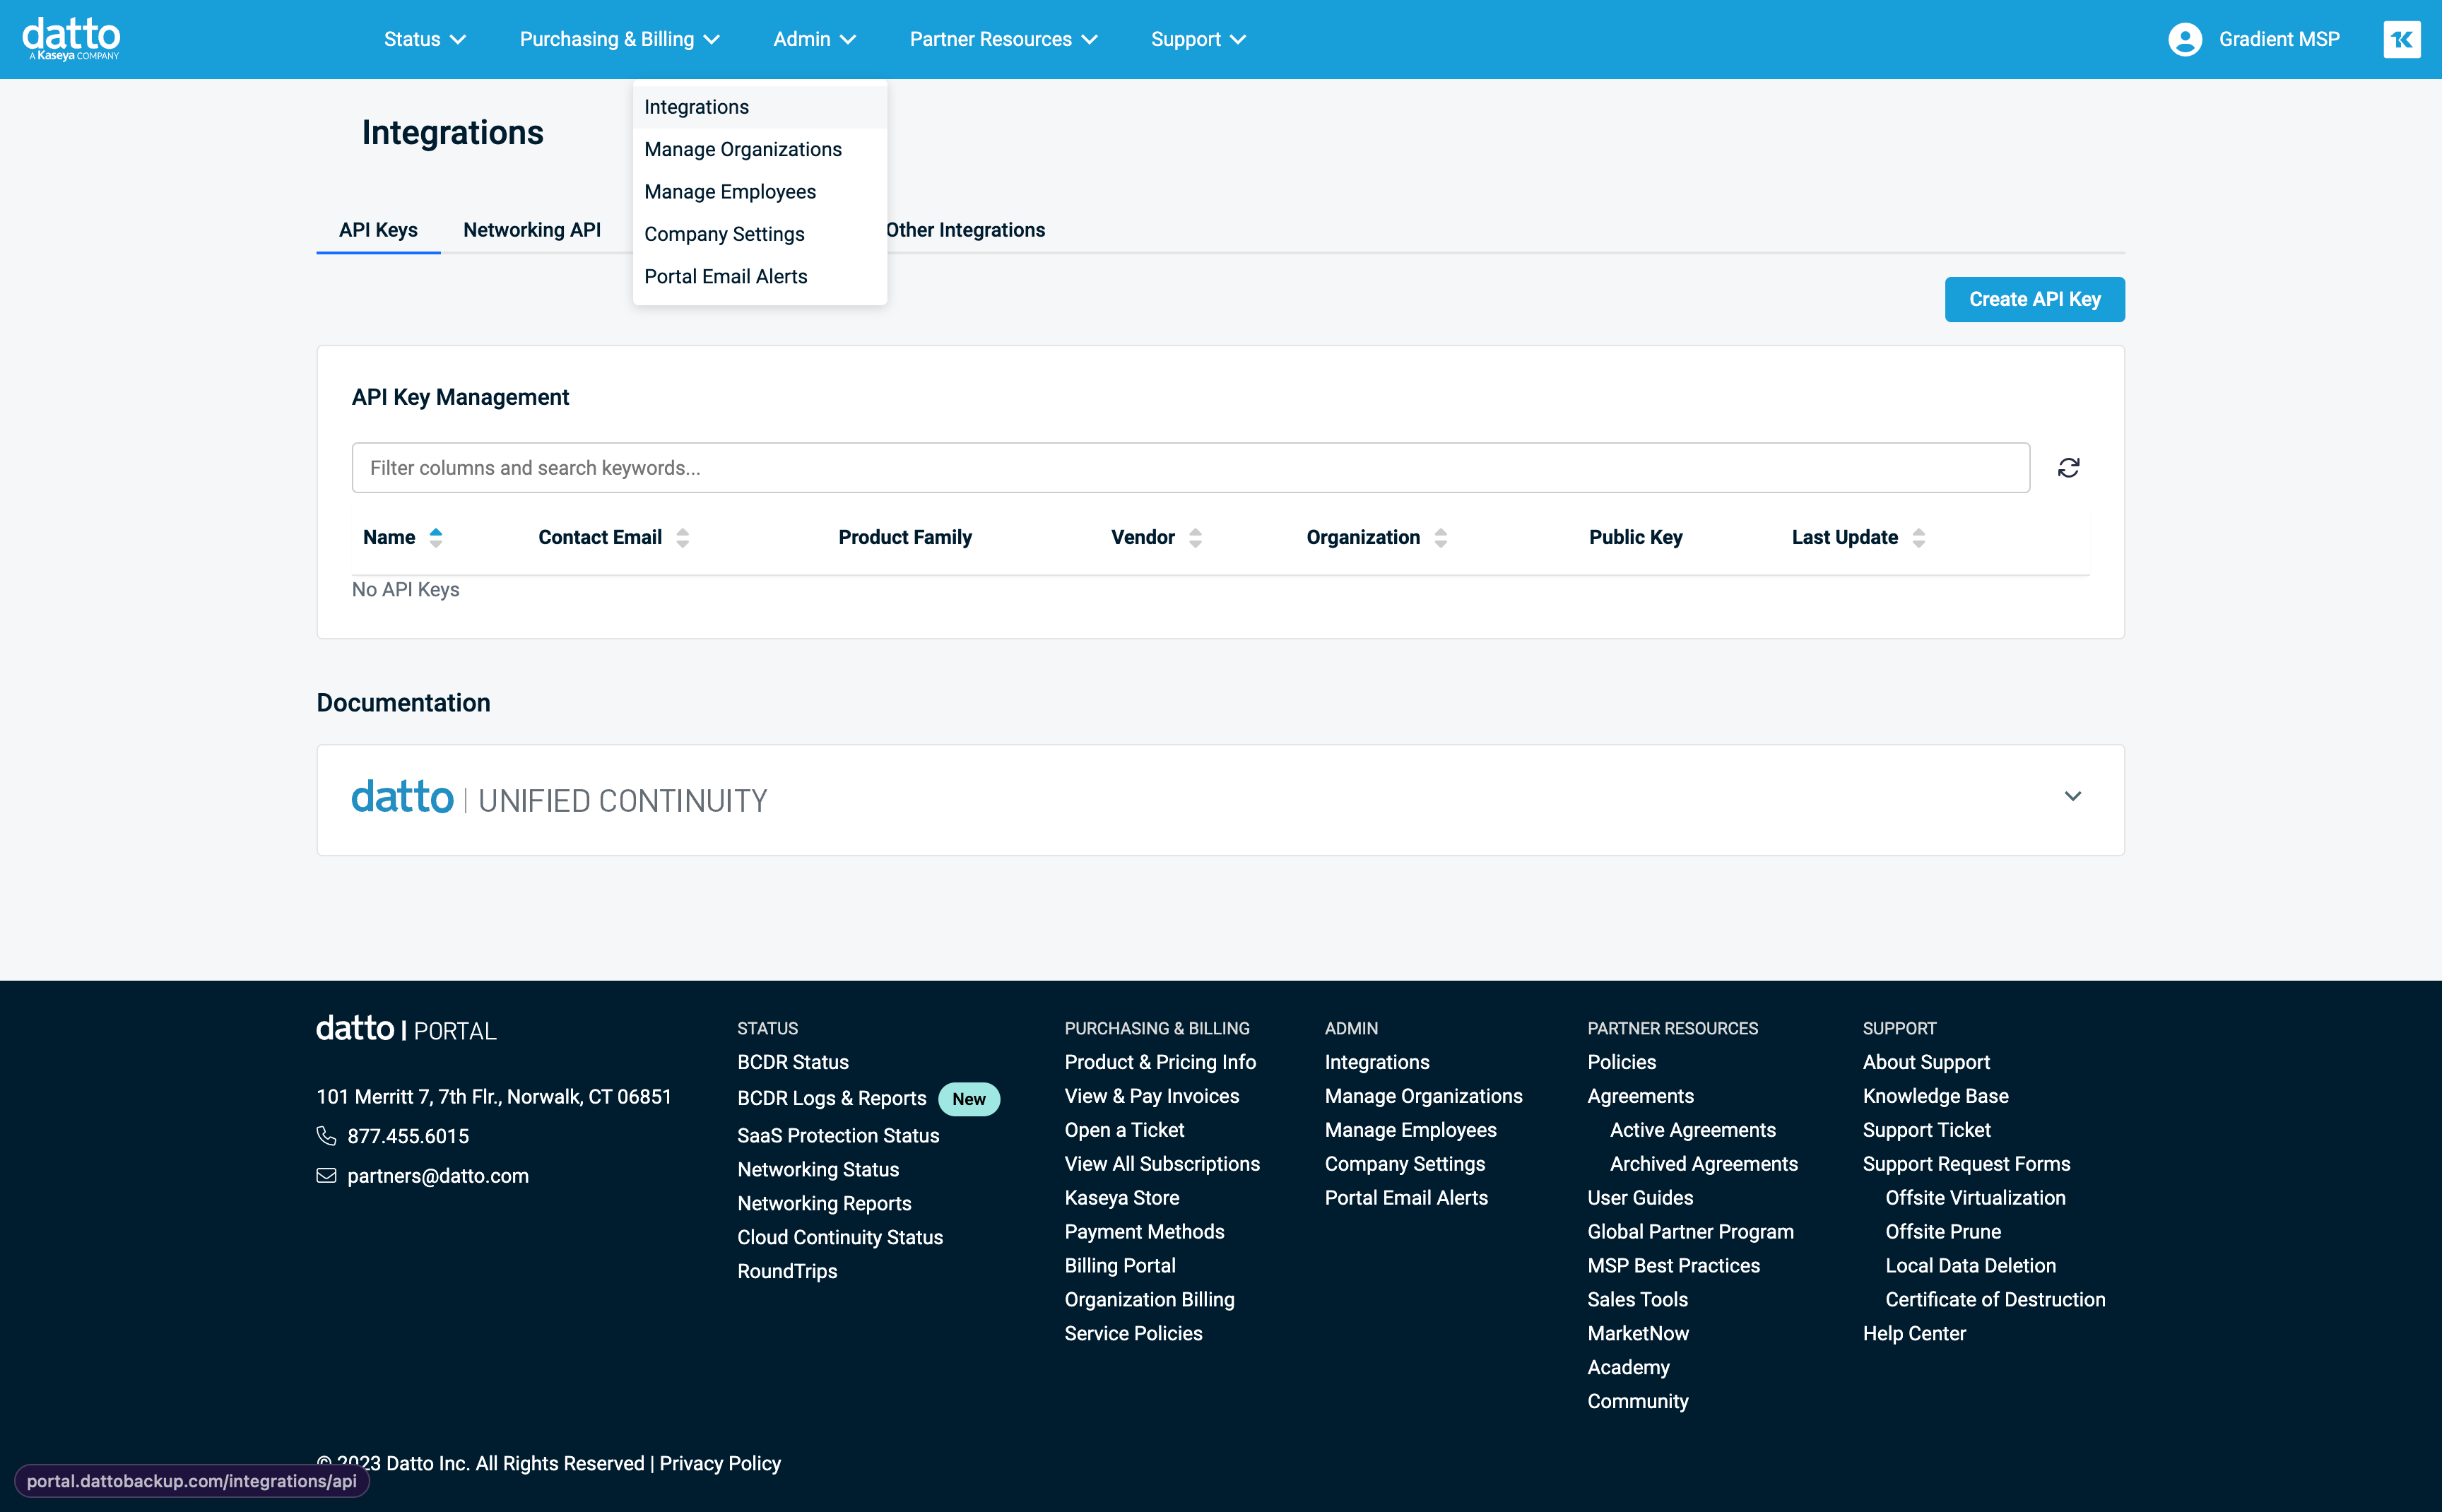
- Click Create API Key, populate the API Key Name and click Create.
- It's recommended that you generate an API key without any Contact Email or Select Vendor, as the API key is known to break.
- Please note: When creating API Keys in Datto, it is very important that the "Select Vendor" dropdown menu is left BLANK. If any vendor is selected for that dropdown box the API Keys that get created will not work when you attempt to authenticate with them.
- You can use a previously generated API key if one has already created one with this combination of client, vendor, and scope already.
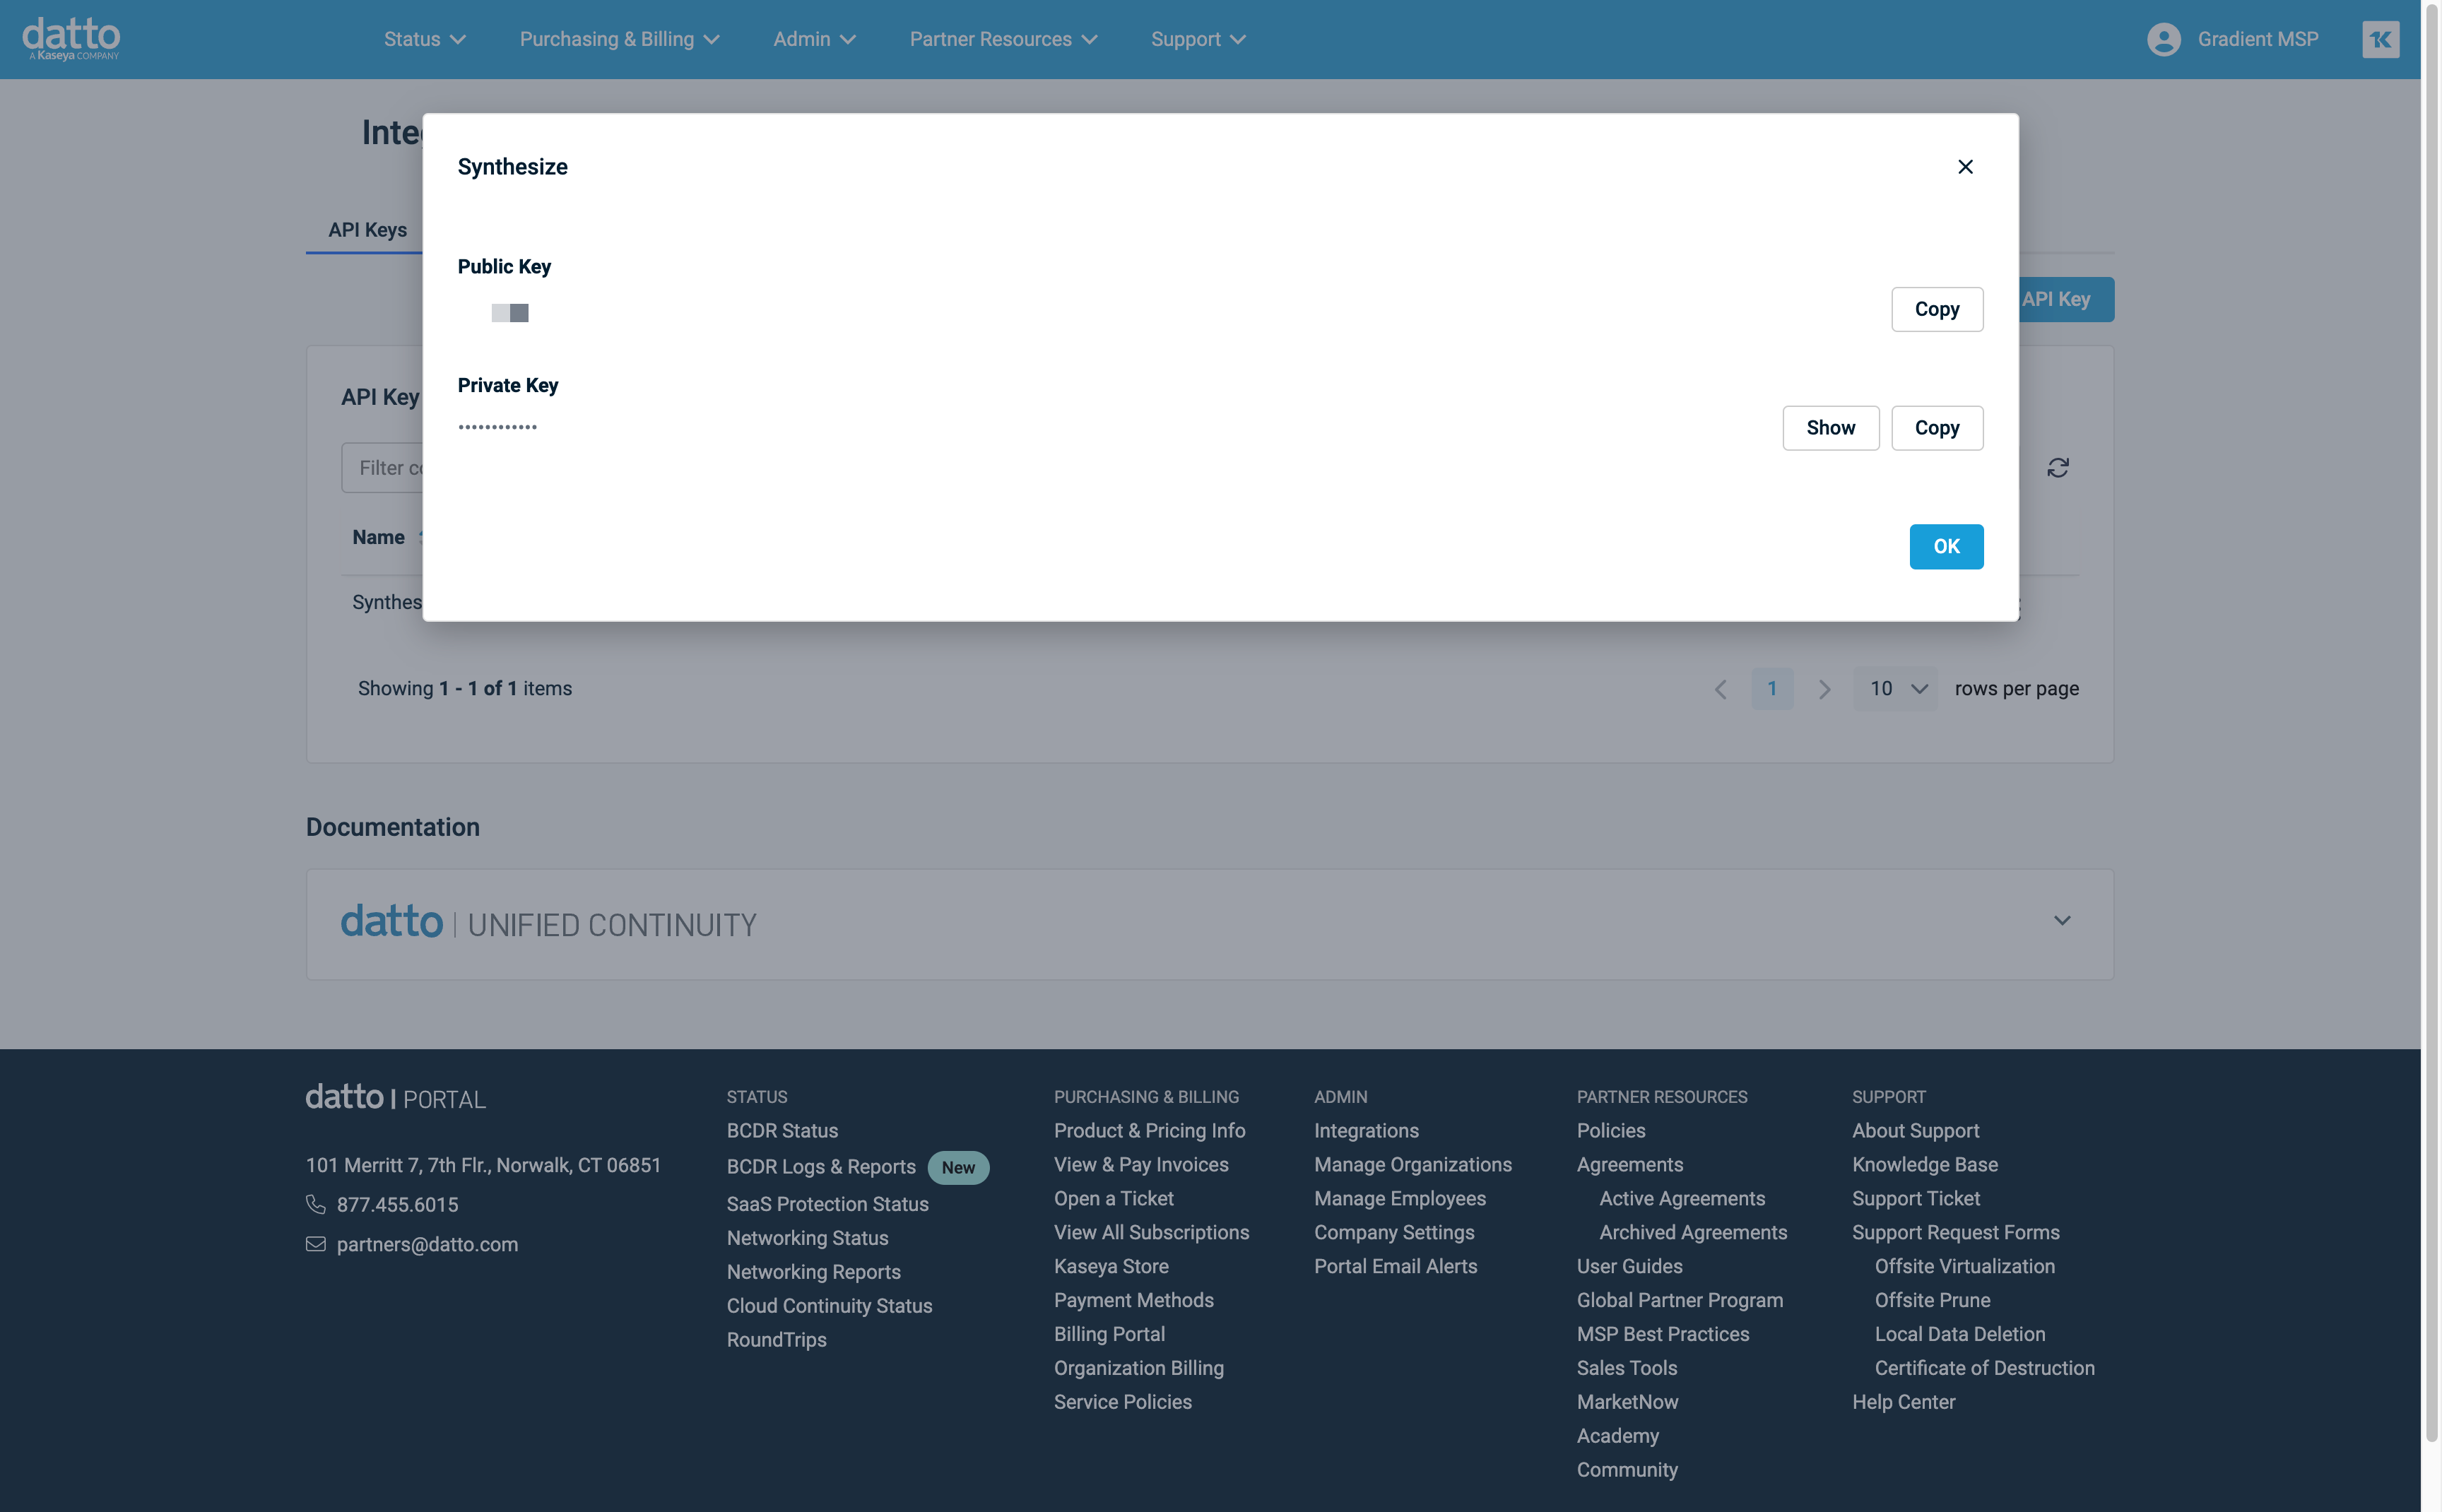
- Save the Public Key and Private Key in a secure location. Note that these keys can be viewed anytime after they've been created.
Connect Datto SaaS Protection
- In Reconcile™, go over to the Integrations tab and select the Datto SaaS Protection integration and click Connect.
- Select Billing Only and click Continue.
- Enter the Public Key and Private Key generated from the Datto Partner Portal in the previous steps.
- Click Authenticate.
- Once successfully authenticated, accounts and services will be generated, and the integration will be updated to a pending status. You can click the status refresh button or simply refresh your browser if you are unable to proceed to the next step.
- Click Next.
Map Accounts and Services
Note: If you need further details on account and service mapping, click here.
-
Map Accounts and Services
-
- When setting up the integration for the first time, accounts are automatically matched if there's an exact name match between your vendor and PSA.
- For accounts not automatically matched:
- Use the filter button beside the account names on the right, or
- Use the search bar on the left to find PSA accounts.
- Drag and drop the PSA accounts from the left to match them with vendor accounts on the right.
-
Proceed to Service Mapping
- Once accounts are mapped, click "Next" to access the Service Mapping step.
- Match services or products from your PSA, displayed on the left, with the corresponding vendor services or SKUs on the right. For ConnectWise PSA users, you can also search by Product ID.
- Ensure at least one account and one service mapping is completed to finish the configuration.
- After mapping the services, click "Next".
-
Finalize Configuration
- Review your mappings and click "Finish" to complete the setup.
- This will start a sync. The "Sync Status" indicator at the top-right will start spinning, showing that a sync is in progress.
- Once the sync is complete, the "Refresh" button will light up pink, indicating the sync is complete. Click that button to see the vendor data filled out.
- Use the filter or sort options to jump to the connected services and start reviewing and reconciling!