Creating and using Social Media Posts
- Step 1 – Creating New Posts from Saved Assets
- Step 2 – Creating New Posts from Scratch
- Step 3 – Review Posts
- Step 4 – Scheduled Posts
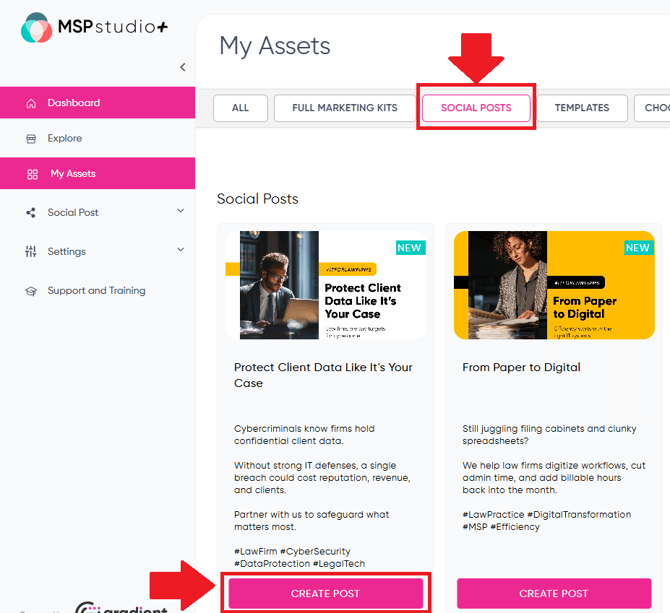
Step 1 – Creating New Posts from Saved Assets
- From your My Assets page, select Social Posts from the top bar, find the Asset you'd like to use for your post, and then select Create Post.
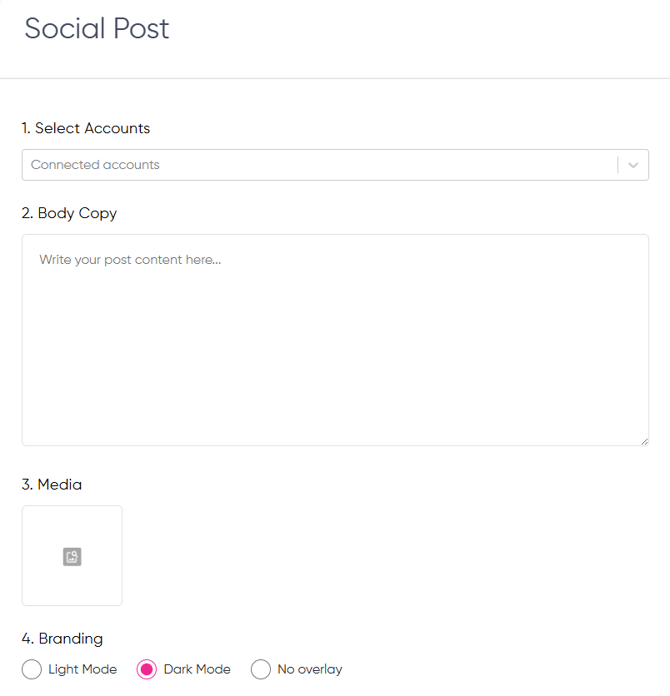
- You'll enter the Social Post page, where you can adjust details for the post and add your branding
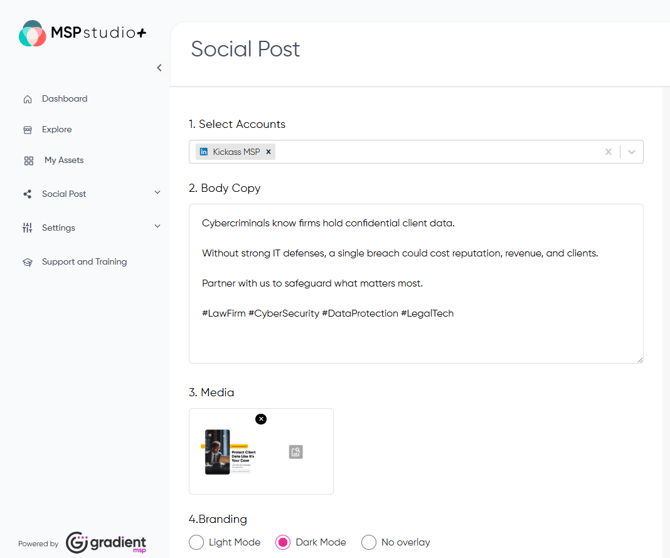
- The left side of the Social Post page includes all the data for the post you are making. The right side displays a preview of that post as it will appear on your social media pages.
- Under 1. Select Accounts, you can select which connected account you would like to post to
- Under 2. Body Copy, you can add or edit the primary text of the post
- Under 3. Media, you can change the graphic for the post
- Under 4. Branding, you can adjust the post to have a Light, Dark, or no overlay.
Additionally, you can select which items of contact information are laid over the post, and where on the post your information is placed. - Under 5. Options, you can select to publish the post now, or Schedule it for a later time and date.
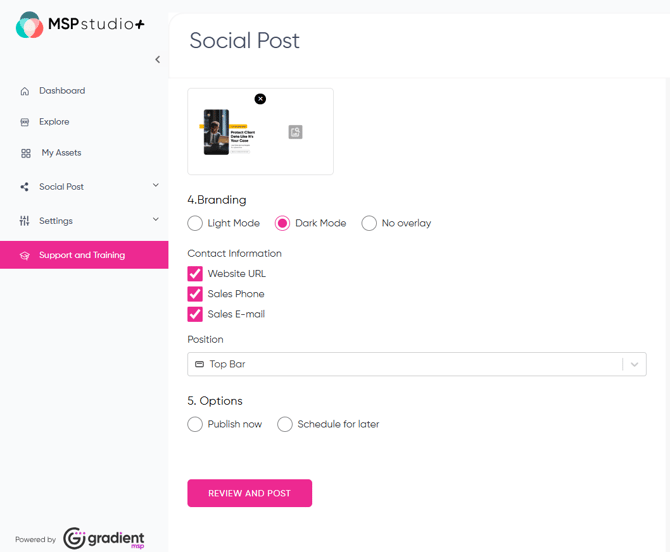
- When you're ready to post or have set your scheduled time and date, go ahead and hit the Review And Post button to finish
Step 2 – Creating New Posts from Scratch
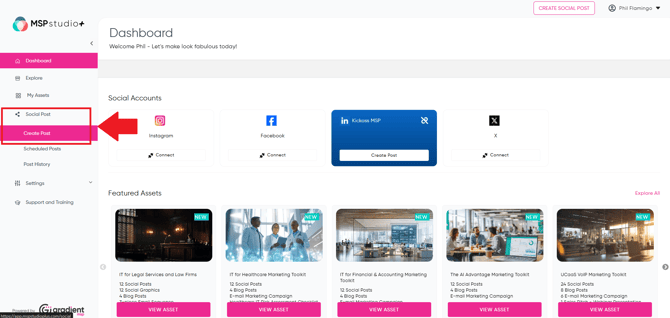
- You can also create a post from scratch, without using any saved Assets. To do so, select Social Post from the left hand menu, and then select Create Post.
- This will bring you to the same Social Post creation screen as when you Create Post from an Asset, but in this case there will be no pre-populated text, graphics, or company information. A completely blank canvas.
- Setting up a post here works the same as if you had created one with an Asset. You can adjust the various options and preview your post on the right side of the page.
- When you're ready to post or schedule your Social Post, you can do so with the Review and Post button at the bottom.
- You can Review posts that you've made by selecting the Post History option under Social Posts from the left hand menu.
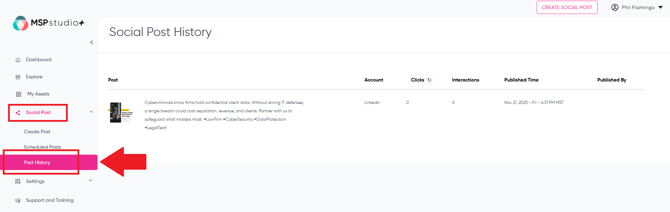
- On this page, you can review your posts, as well as see important information about how they have performed such as Clicks and Interactions across your social media profiles. You can also see the original date and time of the post, as well as the person who published them from your organization.
Step 4 – Scheduled Posts
- By navigating to the Scheduled Posts option under Social Posts, you can review any Scheduled Posts you have still waiting to go out.
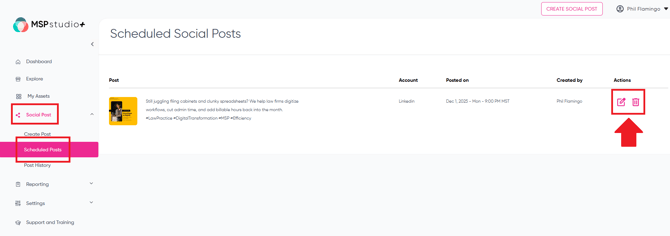
- You can also edit or delete any Scheduled Posts here by accessing those options in the right hand Actions column.