Ready to get ROARING with automated billing reconciliation using Liongard? Let's get started by first connecting the integration. The Liongard integration allows you to sync product usage from custom metrics so you can quickly reconcile services in Gradient.
Table of Contents
- An Access Token from Liongard
- A custom metric in Liongard
- Connect the Liongard Integration in Gradient
Get an Access Token from Liongard
- Login to Liongard
- Select your Profile (top-right)
- From the dropdown menu, select Account Settings
- Select Access Tokens
- Click Generate New Token and choose Liongard API Token
- Record your New tokens and Liongard Instance for use in Reconcile™ Billing.
Note Please keep your key in a secure place and do not share it. You will not be able to get your Access Key Secret again unless you were to generate a new access token.
Create a Custom Metric in Liongard
Note If you haven't done so already, please review the Liongard Requirements.
- Login to Liongard.
- Go to Admin > Metrics.
- Add Metric or Clone from existing Metric.
- Select Inspector.
- Give the Metric a name and prefix with 'Gradient' (Reconcile™ Billing filters custom Metrics by this prefix).
- Ensure Metric Display is enabled.
- Choose a System Inspector from the dropdown in the Query Builder.
- Use the AI Query Companion to create a metric to pull your desired data. Alternatively, you can enter a JMESPath query for the Data Print in the Data Print Query.
- Ensure the Query Results evaluates a whole number, and validate this quantity is correct by reviewing the Data Print, drilling into each array and object.
Connect Liongard Integration in Reconcile™ Billing
Step 1: API Authentication
- Login to Gradient.
- Go to integrations.
- Hover over the Liongard integration card, and click Connect.
- Input your Instance (This can be found from your Liongard URL. For instance, if your Liongard URL is https://us1.app.liongard.com, your Instance would be us1), Access Key ID, and Access Key Secret.
- Click Authenticate.
- Once successfully authenticated, continue on to the next step in the Liongard Integration Wizard.
Step 2: Map Accounts to Environments
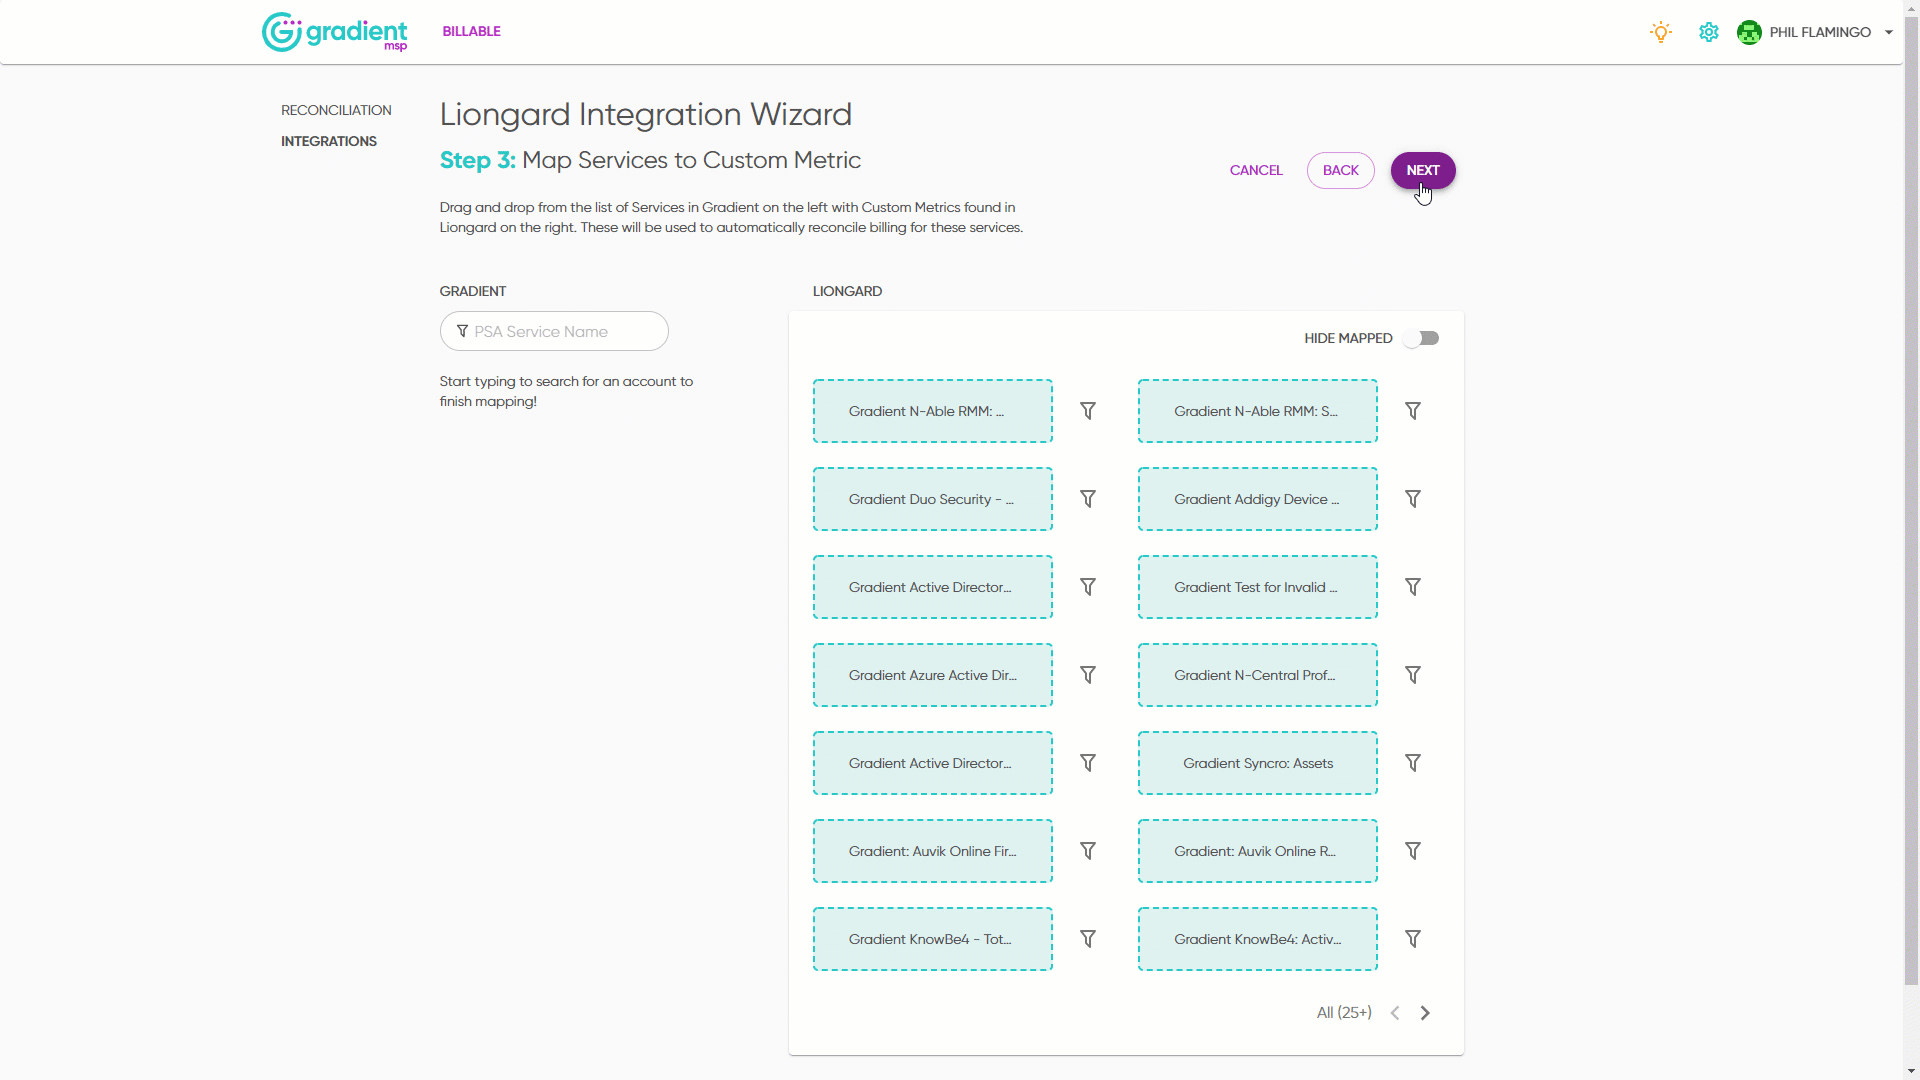
It's recommended that all your Accounts in Reconcile™ Billing be mapped. Drag and drop the accounts from Gradient on the left to the environments from Liongard on the right.
When you are ready, click Next.

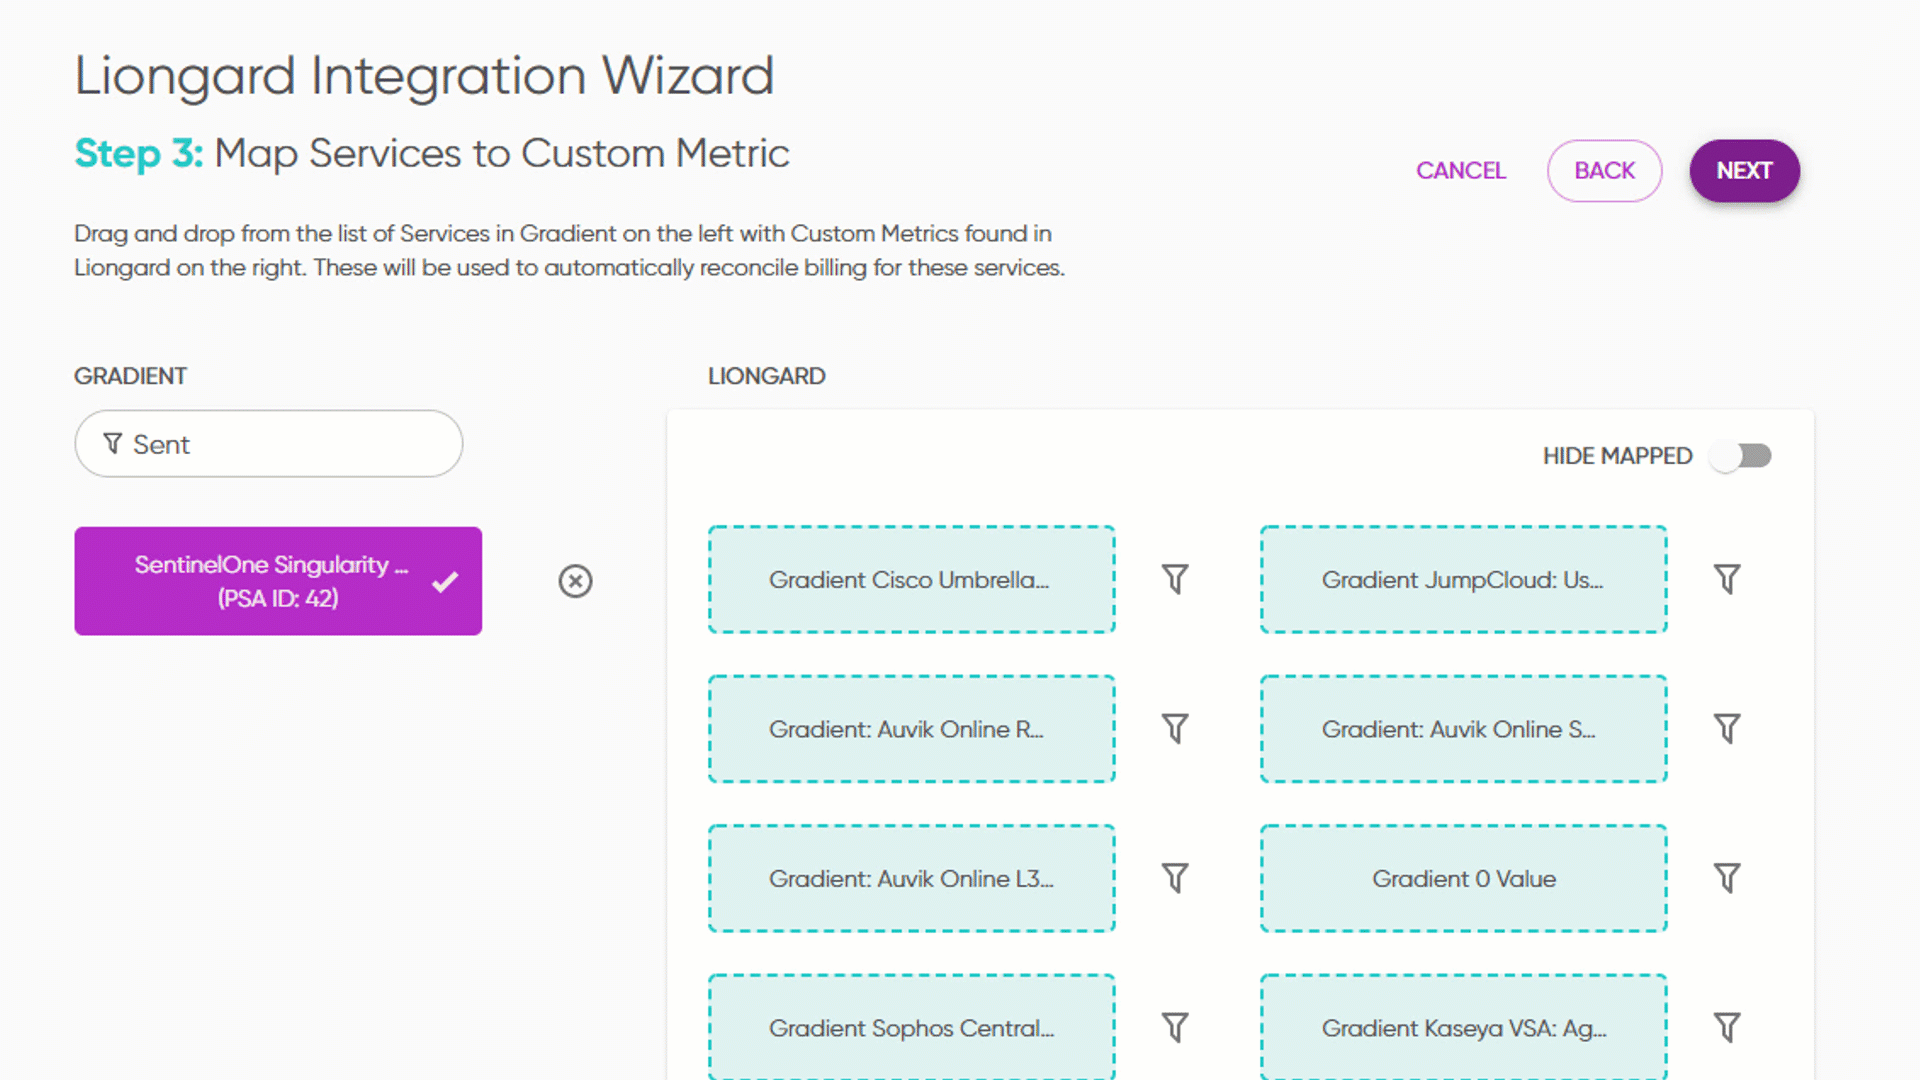
Step 3: Map Services to Custom Metric
Note that Multiple services can be mapped to a single metric. Not sure where to start? Check out some Use-Case Scenarios or Liongard Sample Metrics to get your creative juices flowing!
Step 4: Review and Confirm
Once validation is successful, you'll be given an opportunity to review and confirm. When you are ready, click Finish to start syncing information into Gradient Billing.
Tip Sample Data will further provide you with an opportunity to validate the data to ensure the quantities you are importing are correct. You can double-check these evaluated numbers by reviewing System Inspector queries from the Metric(s) you created from the previous steps.
Step 5: Service Reconciliation
Congratulations, you're almost there! Once the sync is complete, you can immediately start reconciling the services you've mapped to Metrics.
To make your life easier, use the filter by vendor tag, select Liongard and start reconciling!
Note When you map a service to a custom metric with the Liongard Integration, the service will automatically be tagged with a vendor tag 'Liongard'.
Tip Want some further inspiration? Check out some Use-Case Scenarios or Liongard Sample Metrics to get you started!